We first published this video in five parts in Kiteworld (Issue 105) as part of our Lockdown KiteSOFAing series. We get asked for tips on the tack so much that we thought we would bring back the video in its entirety and give you, what we think, is the key skill to really nailing this trick.
Most people focus so much on their board and feet when learning to tack a surfboard, they forget the most important element that makes this move possible; the kite! Get the kite movement and timing wrong and everything else will struggle too. This blog post breaks down the fundamental timings of the bar and kite movement throughout the tack and will have you upping your tacking game immediately.
Let’s face it, both the push and roll tack are such elegant moves they make any rider look effortlessly cool. This elegance comes from the fact that your body, board and kite all move in the right way at the right time. And central to that, the right kite movement and its timing is the foundation for all tack tricks; surfboard and foil. So if you can understand and learn this technique, it will open up a whole range of cool new moves to try.
So here’s the full video to watch and do read on for some further tips:
Why learn to tack?
Tacking is a great way to maintain ground in order to catch more waves on your surfboard. It allows you to change direction really quickly, without losing ground downwind, meaning you can get upwind much faster. The tack also has a great flow feeling when you get it right and very different to a gybe. On a foil, it is actually a gateway skill to some other beautiful moves and will see your foiling become really dynamic and skilled.
When to start learning the tack
It’s a good idea to get the basics of riding a surfboard or foil under your belt before you start to progress to tacking. Learning to gybe, hard carving turns, riding toeside and getting comfortable with foot changes are good skills to focus on before getting to the tack and get you comfortable being more dynamic with your board.
Getting the kite movement and timing right
When it comes to tacking, getting the timing and position of the bar and kite in sync with your body is the most important element. Here we break down these timings in a step by step way to make it easy for you to remember and repeat when you get back out on the water.
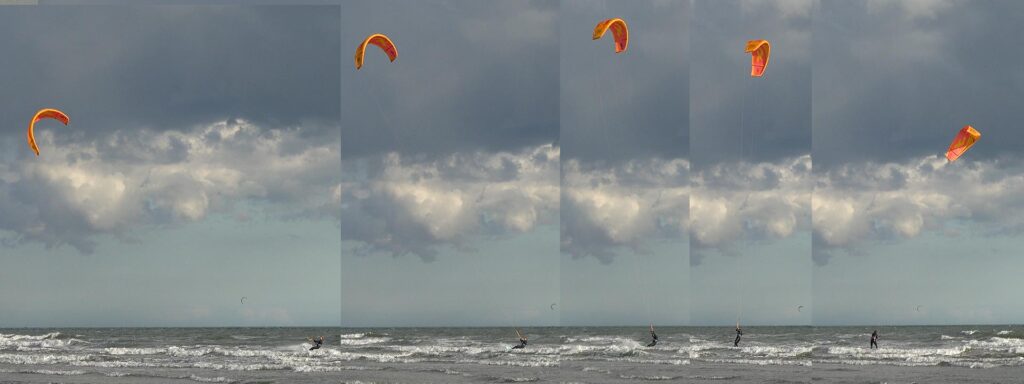
STAGE 1 – Entry: Kite Up to 12
You are coming into your tack…….
- Hold your ground and course and maintain your direction of travel.
- Good speed and control is important throughout this stage of the tack.
- Direct the kite up to 12
- DO NOT CARVE YET – hold your original direction as you bring your kite up to 12.
- THE AIM of this stage is to get the kite flying as close to the top of the wind window as possible and pointing directly into the wind. The tension created from carving too early will stop the kite moving to the overhead position and you won’t be able to position you or the board correctly.
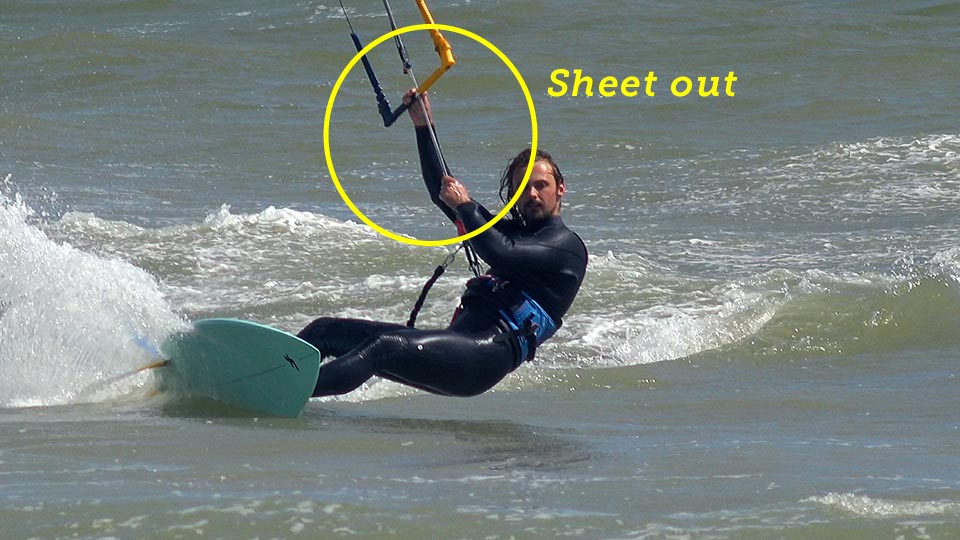
STAGE 2 – The Carve: Sheet Out
- Your kite is now close to 12 but we want to get it right overhead and to do that…
- Sheet the bar out fully at this point – THIS IS REALLY IMPORTANT, SHEET OUT FULLY! IF your tack is not successful and you feel resistance; check to see if you have sheeted out enough.
- The act of sheeting out allows the kite to luff and fly forward right over your head.
- Carve hard upwind
- The kite is overhead, flying with you, as you carve upwind
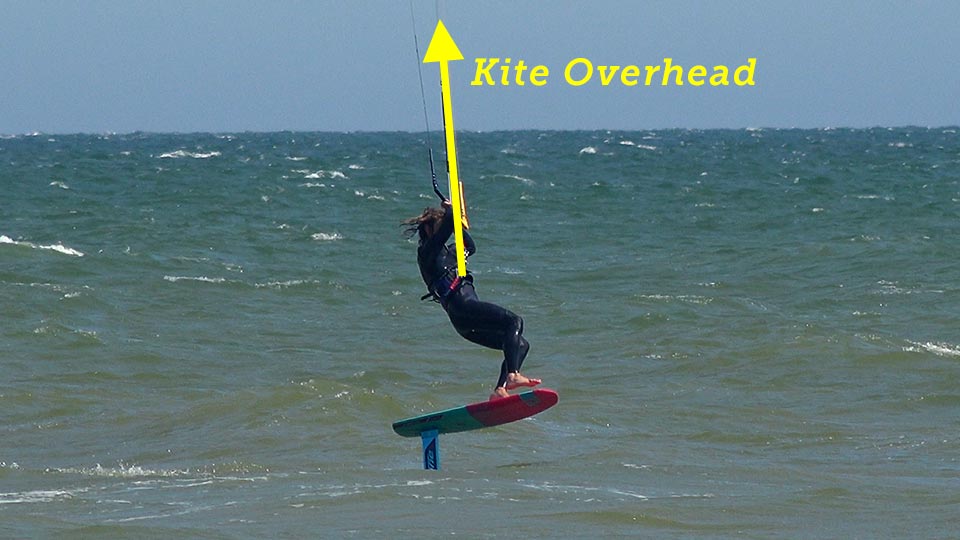
STAGE 3 – Body Rotation: Kite Stays Overhead
- The kite continues to stay at 12 for both the push and roll tack
- Now you sheet in, getting which will help get your weight forward over the board
- Allowing you to rotate directly under the kite.
- Then pull with your front hand – but only when your new front foot is in place
These three stages are a brilliant way to break down the tack and get a good feel of what your board and kite needs to be doing together. The foot change will become far easier after this because the rotation of the board combined with the lift of the kite, from directly above, will give you space and time to change feet. There are some other key body position tips that will help with getting the carve and rotation smooth and controlled but we’ll save for next time!
So go give it a go and let us know how you get on – Happy Tacking!