UPDATE: Added new Youtube video with tips for stance, gybes and the foot change at the bottom of the article.
I’m a bit of a latecomer to the whole wingfoiling explosion. Partly due to delays getting the right size board and because I still love Kitefoiling. I have loads of new things I want to learn on my foil and it gets me out in a wide range of wind strengths (10 – 35 knots), so I wasn’t really looking for a new hobby. Having said that, I have been curious about all the winging fuss and it does look like a great way to ride waves, without all the paddling and excessing pumping!
So I have given winging a go. I’ve now been out 7 times over 10 weeks (injury and the lack of a board slowed things down a bit) and think because of my kitefoiling skills, I’m progressing pretty quickly. I am already thinking about how I would teach the core skills, both in person and in videos, and I have been playing around with the wing to see how different positions affect performance and control. It really is a very liberating experience; with full depower and the ability to spin the wing in all manner of different ways, the possibilities are endless and fun.
I won’t lie I’m not 100% convinced it’s for me. I am still keen to get back on my kitefoil, but it does have a wide appeal to people of varying sporting backgrounds and it will be a very interesting few years to see how the sport develops. But, if you are learning to wing here are my 7 tips after 7 days of wingfoiling.
First up – your equipment, previous experience and the conditions at your local beach will all have a big impact on how you improve at winging: Here are my stats for reference
- Age: 43
- Weight: 105kg / 232lb
- Height: 198cm / 6’6”
- Kiting: 21 years
- Kitefoiling: 4 years
- Windsurfed: 12 years (but haven’t done it in 20 years!)
- Wing: F-ONE Swing 5.0
- Board: F-ONE Rocket Wing v2 6’0” (120l)
- Foil: F-ONE Phantom 1780 + 85cm Carbon mast
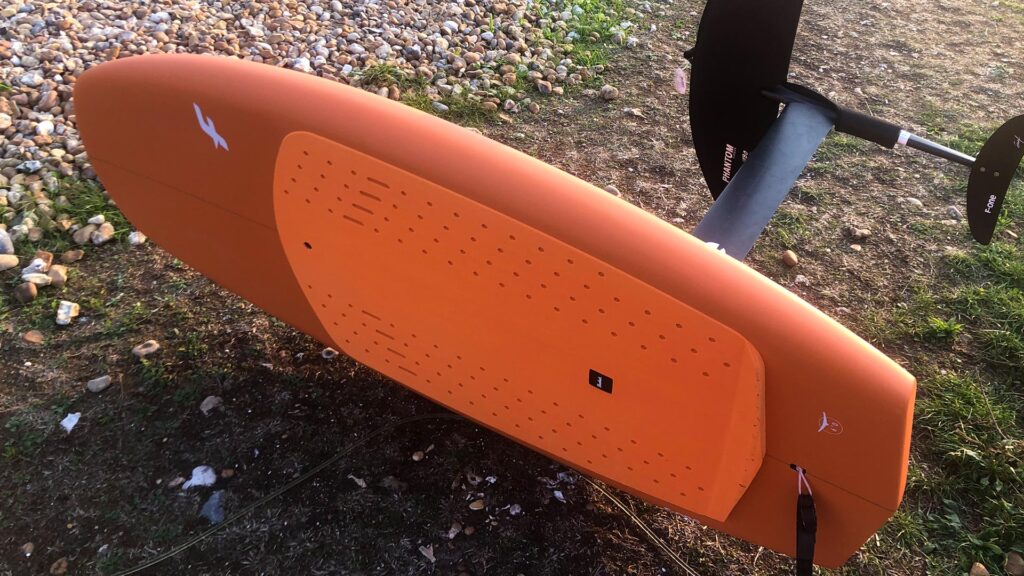
1) Board Size Matters
I’m not saying anything new here, but its worth re-iterating that starting on the right size boards will make a huge difference. Whilst waiting for my F-ONE board to arrive, I tried a slightly lower volume board; I got up ok, but it was under water a lot and hard work to get going. It was good but the length got annoying very quickly and the 2 inches less width was surprisingly less stable.
My big take away; getting the right board will make learning all the basics way way easier and more fun. Just accept that you might have to get a smaller board at some point in the near future, but if you start small you may never get off the starting blocks. For me, the standing up part is the hardest bit of it all (made harder by being a tall, heavier than average guy who isn’t that flexible). Once I’m up it’s relatively easy, having kitefoiled for years but, I dread trying to stand up on the thing. It gets easier with practice. Having the right board under foot speeds things up massively. Volume is really important – more than your weight for sure and width really helps too. For me now, 6’0” still feels fine for everything I am learning – no doubt riding a 5’0” board would be amazing but there is no way I’m going to be able to stand up on something with volume that is close to half my body weight!
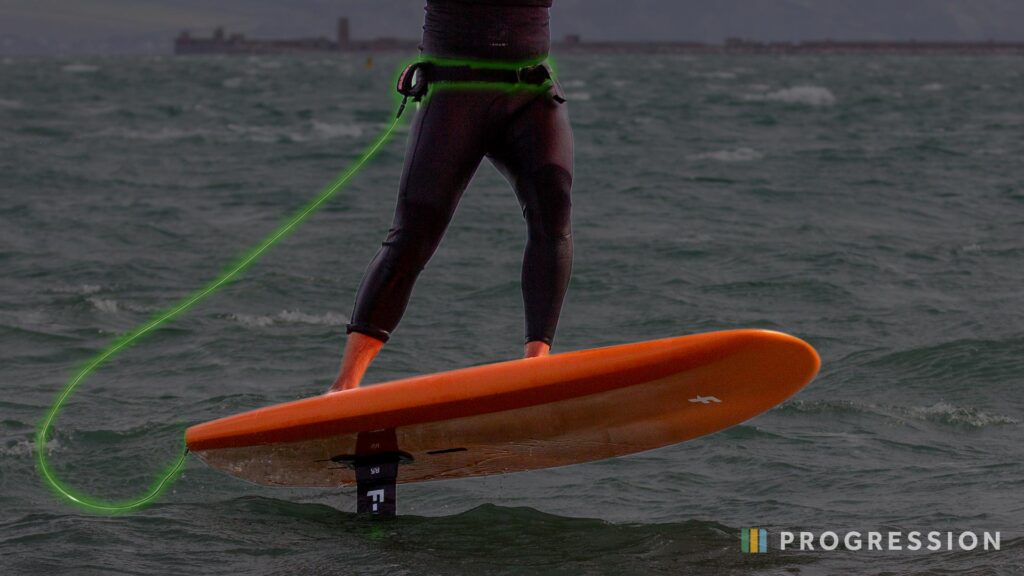
2) Attach the board leash to a belt
Rather than have the board leash attached to your ankle and then get caught up in it all the time, wear a simple belt and attach the leash there. It helps to keep the leash out the way and also allows you to untangle the leash by sliding it around the belt. Everyone down our beach now does this and it seems far more convenient. Some people have the wing wrist leash attached to the waist belt too. I haven’t tried that yet but might be worth a go.
3) Pumping – Wing and Board/Foil
Unless you are really powered you are probably gonna have to pump the wing and/or board to get it up and foiling. No one really makes this look graceful, but there are definitely some ways that are more effective than others. I’ve found bearing the board off slightly downwind helps. I keep the wing at about a 45 degree angle, giving short hard pumps, and with the wing at this angle you get some lift and some sideways pull which you can translate into power against the foil. I also try and keep the wing at arms length, forward towards the nose of the board. This way, when you pump, think about pulling the board toward the wing to get it moving. You’ll also find that when you start to rise up on the foil, it is easier to keep weight forward and level the board out. Pumping the board is more tricky to learn; If you kitefoil already then you can practice easily on that, and practice wake foiling behind a boat is good too.
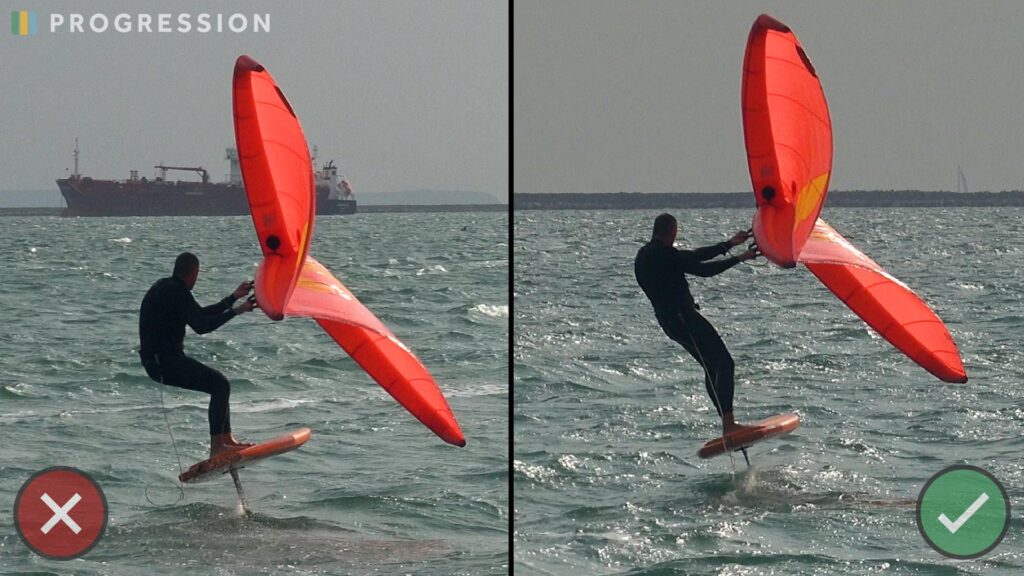
4) Stance – stand tall, straight arms
I think the stance part is where windsurfers have a bit of an advantage. The stance for winging is very similar to windsurfing because they are used to having to hang off a sail. To start with, It’s easy to ride with bent legs and bent arms with quite a lot of tension in your body. But, this gives you less control of the board/foil and wing and will get you tired out really quickly. 30 minutes into my second session and my forearms were nearly exploding and I could hardly hold the wing anymore. But then I remembered back to my windsurfing days and the stance of hips forward and straight arms; suddenly the wing felt light and balanced in my hands rather than me hanging off it. Imagine you’ve got a golf ball held between your butt cheeks! Squeeze those glutes to stop yourself from dropping the ball and it will help to push your hips forwards, that in turn will allow you to stand more upright. Then shoulders back and push the wing away from your body. Two hours of winging is now so much easier!
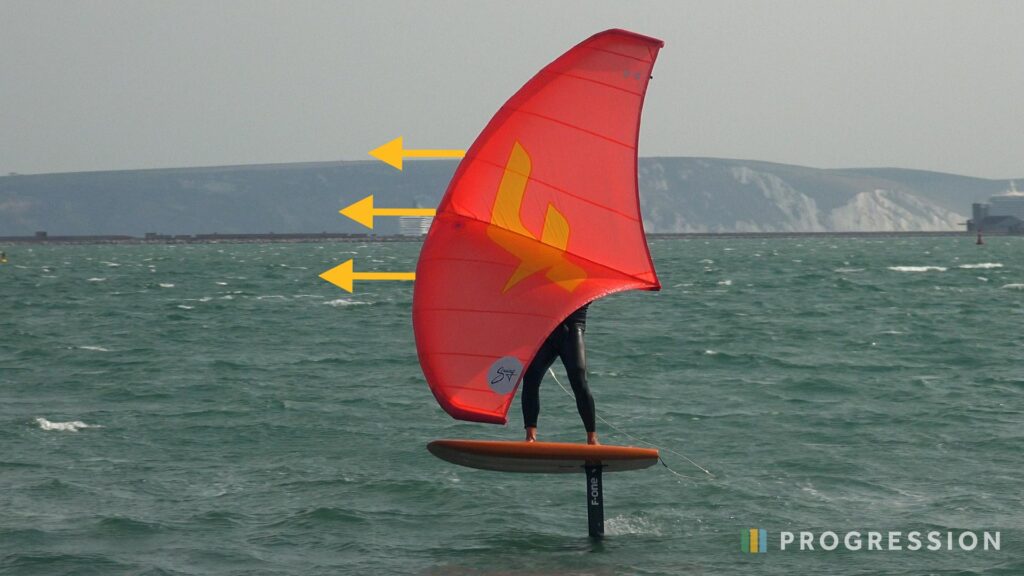
5) Upwind – Wing Forward
This leads on from getting that correct balanced stance – standing straight; hips forwards and shoulders back. Now the wing is balanced in your hands, you’ll find you can move it around, experiment with its position. Try pulling slightly harder with your backhand. Try letting go with your backhand and balancing the wing with just your front hand. Pushing the whole wing forwards towards the nose of the board was an eye-opener for me for making everything so much easier. Suddenly the wing gets even lighter but you also can point an extra 5, 10, 15 degrees higher upwind! And it makes sense – in kiting the further forward you can get the kite in the wind window the higher you can point upwind. In the old days of windsurfing, when we had adjustable mast tracks, you pushed it right to the front to go upwind. It’s fun to play around with the wind position as it will help you when you start doing more than just riding back and forth.
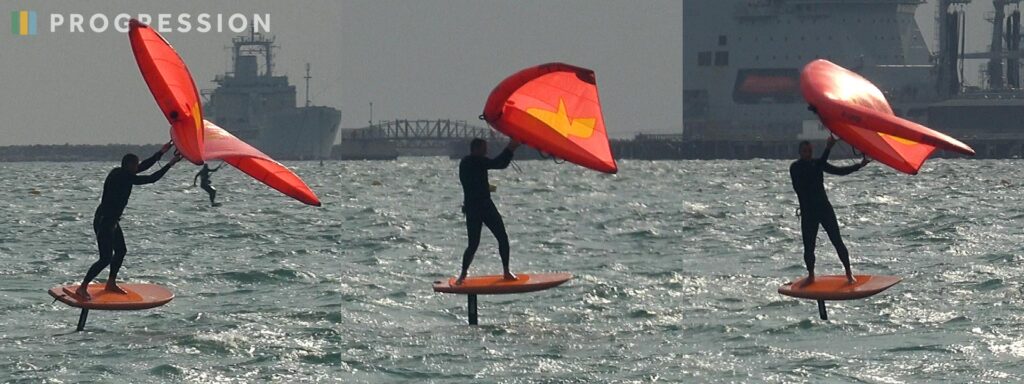
6) Carving Turns – wing high and Forward
And here is our first example of that. If you can carve on a kitefoil, then doing it on a wing is pretty straightforward. For those that don’t foil already, it can be tricky to master. I’ll keep it brief for now (there is a lot to really understand about the gybe) but the essential thing to realise is that these big wing foils will glide for ages if you just keep weight over your front foot. When it comes to turning, it’s less about pushing hard on one rail but more from light pressure on a rail and using the foils yaw to pivot around the mast using the front wing. What I discovered was that if you can keep the wing forward in front of your front leg then it will help to keep your weight forward through the carve. It also means the pull from the wing, is in front of your front foot and the front foil wing*, so it helps to pull the nose of the board around, using the yaw. So only light pressure on your toes (or heels) to carve, Stay reasonably upright and keep the wing at arms legs towards the front of the board.
* What idiot decided to call the thing we hold in our hands a wing, when we already have two wings on the bottom of the foil – endless confusion!

7) The Foot Change – Pop the board
Next up is the foot change which is another technique that if you are coming from kitefoiling is relatively easy. In fact, it’s so much easier as you have that crazy big stable platform. But if you are not a surfer and have never foot changed before, its a challenge to learn and understand the right way to do it. Using Kitefoiling as a reference for coaching, the fundamentals are the same and easy to learn. These are the three points I’d focus on:
- Pop the board up, so it rising as you go to change your feet. Initially drop low on the mast (step 1) and then pop it up just as you step forward with your back foot (step 2).
- Why does this help? Because when you step forward and all your weight is forward, the board is pushing up into your feet, rather than you stepping forward and your weight pushing the nose of the board down.
- Push down on the wing as you get your new back foot back (see image 3 to 4). This allows you to keep your weight even over the board, and also get some weight off the board. Then you learn to shift your weight more easily forward and backwards to find the right balance point to correct any pitch issue with the foil.
All of this foot change technique is exactly as we do on a kitefoil, Winging is even easier as we don’t have to worry about flying the kite around.
So those are my key takeaways from my first 7 wingfoil sessions. Still way more to learn as I’m now trying to perfect my tacks and starting to ride waves, but hopefully something above will help with whereever you are with your wingfoil progression. And as I said, I am new to all of this, no doubt I’ll adapt my techniques as I improve but I’d love to hear if anyone has different ideas or ways to improve on this.
I have shot some rough video for the stance, carving turn and foot change techniques, check out my Instagram posts over the next couple of weeks for short technique tips and the Progression YouTube channel for more details explanations. Once they are online I’ll add links to them here.
Update: Youtube video focusing on 3 key tips for the Stance, Gybe and Foot change:
Also be sure to check out the new Wing Surf World online mag but particularly the “Wingsurfing Journey” for more info on getting into Winging!